Farmer’s Cheese is the kind of simple comfort food that connects you to generations past. Soft, creamy, and delightfully tangy, this fresh cheese is incredibly easy to make and requires only a few basic ingredients. Whether you’re spreading it on warm toast, crumbling it over salads, or just sneaking a bite straight from the fridge, it’s a versatile staple that deserves a place in every kitchen.
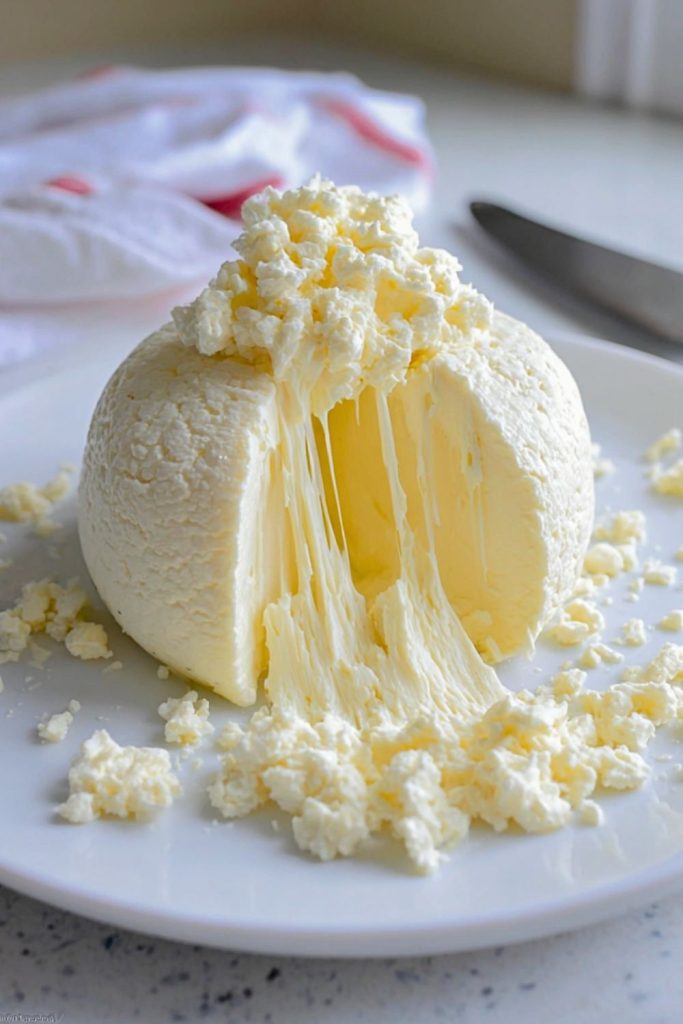
What makes Farmer’s Cheese stand out is how rewarding it feels to create from scratch. No special equipment or obscure ingredients needed—just whole milk, acid, and a bit of patience. It’s a recipe that’s part science experiment and part rustic tradition, leaving you with a beautifully textured, subtly flavored cheese that tastes like home.
What Kind of Milk Should I Use?
Whole milk is ideal for making Farmer’s Cheese because of its high fat content, which results in a creamier texture. Avoid using ultra-pasteurized milk, as it won’t curdle properly. If you have access to raw milk, even better—the depth of flavor and richness it offers will elevate your cheese to another level.
Ingredients for the Farmer’s Cheese
- Whole Milk: The foundation of your cheese; opt for high-quality, non-ultra-pasteurized milk.
- White Vinegar or Lemon Juice: Acts as the acid to separate the curds from the whey.
- Salt: Enhances flavor and helps preserve the cheese.
- Optional Cream: For an extra luxurious finish, a touch of cream can be stirred in at the end.

How To Make the Farmer’s Cheese
Step 1: Heat the Milk
Pour the whole milk into a large, heavy-bottomed pot and set it over medium heat. Stir occasionally to prevent scorching. Heat until it reaches about 190°F (just below boiling), and small bubbles start forming around the edges.
Step 2: Add the Acid
Turn off the heat and slowly add your vinegar or lemon juice while gently stirring. You should see the curds begin to separate from the whey almost immediately. Let the mixture sit undisturbed for 10 minutes to fully separate.
Step 3: Strain the Curds
Line a colander with cheesecloth or a clean kitchen towel and place it over a large bowl. Carefully pour the curdled mixture into the colander, allowing the whey to drain out. Let it drain for 10 to 20 minutes, depending on your desired consistency.
Step 4: Season and Shape
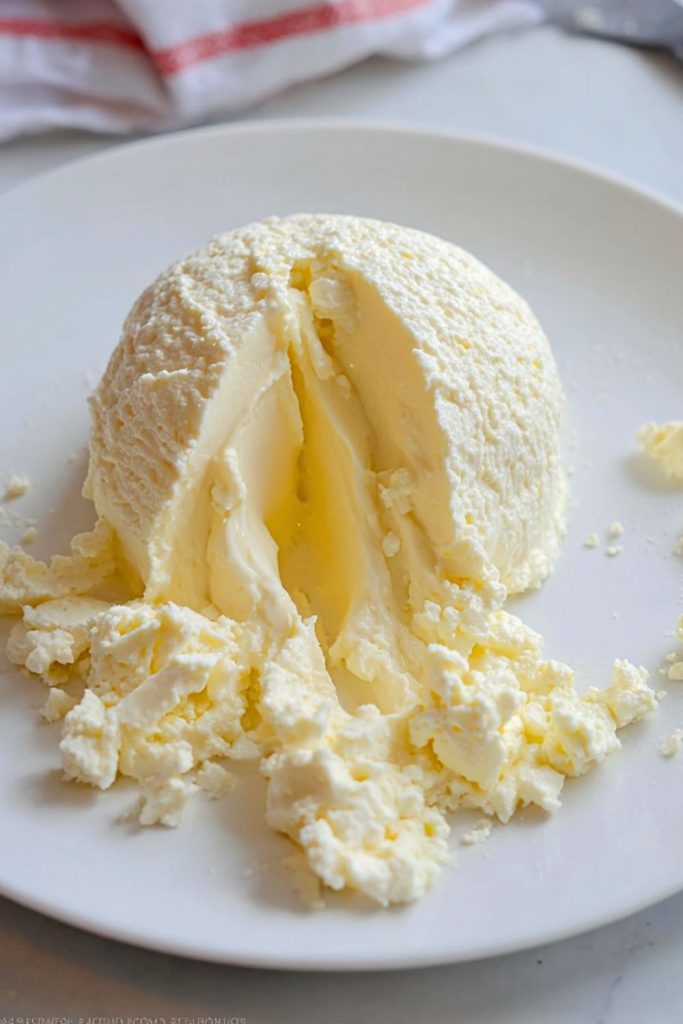
Once drained, transfer the curds to a bowl and add salt to taste. If you prefer a creamier texture, stir in a few tablespoons of cream. Press the cheese into a mold or bowl to shape, or leave it rustic and crumbly.
Step 5: Chill and Serve
Cover and refrigerate your Farmer’s Cheese for at least an hour to firm up. Serve cold, spread on bread, or crumble into salads. Enjoy your homemade cheese!
How to Serve and Store Farmer’s Cheese
Farmer’s Cheese is endlessly adaptable. Serve it spread on warm sourdough, layered in sandwiches, or crumbled over roasted vegetables. It also makes a creamy base for dips and a wonderful filling for blintzes or pierogi. Add fresh herbs, garlic, or cracked pepper to tailor it to your taste.
To store, wrap the cheese tightly in parchment paper and then place it in an airtight container. Refrigerated, it stays fresh for up to a week. For longer storage, you can freeze Farmer’s Cheese, though it may change in texture once thawed.
Frequently Asked Questions
How long does Farmer’s Cheese last?
It lasts up to 7 days in the refrigerator when stored in an airtight container.
Can I freeze it?
Yes, but keep in mind that the texture may become slightly crumbly after thawing. Freeze in airtight packaging for up to 2 months.
What can I do with the leftover whey?
Whey is rich in protein and can be added to smoothies, soups, or used in baking bread.
Can I use something other than vinegar or lemon juice?
You can use citric acid as an alternative. Just dissolve it in water before adding to the milk.
Is Farmer’s Cheese the same as Ricotta?
They are similar but not identical. Ricotta is made from whey, while Farmer’s Cheese is made from whole milk, giving it a firmer texture.
Can I make it dairy-free?
This recipe relies on dairy to curdle and form cheese, so unfortunately, it can’t be made dairy-free using the same method.
Want More Appetizer Ideas?
If you love this simple and rustic Farmer’s Cheese, check out these other comforting and flavorful appetizers:
• Cheesy Spinach Stuffed Shells for a hearty, melty bite.
• Taco Ranch Bites for something zesty and fun.
• Deep Dish Pizza Cupcakes for a cheesy, handheld treat.
• Mississippi Sin Quiche with a creamy, indulgent filling.
• Creamy Boat Dip (Rotel Ranch Dip) for a quick and satisfying party favorite.
Save This Pin + Share Your Results
📌 Save this recipe to your Pinterest appetizer board so you can come back to it any time.
And let me know in the comments how yours turned out. Did you add herbs or keep it classic? Did you press it firm or leave it soft and spreadable?
I love hearing how others make these recipes their own. Questions are welcome too—let’s help each other cook more creatively.


Farmer’s Cheese
- Total Time: 35 minutes
- Yield: About 1.5 pounds of cheese
Description
Farmer’s Cheese is a creamy, soft cheese made with just a few simple ingredients. Its fresh, slightly tangy flavor makes it perfect for spreading on bread, crumbling into salads, or incorporating into savory dishes. Homemade and endlessly versatile, this cheese is as rewarding to make as it is to eat.
Ingredients
1 gallon whole milk (not ultra-pasteurized)
1/4 cup white vinegar or lemon juice
1 teaspoon salt (or to taste)
Optional: 2-3 tablespoons heavy cream (for creamier texture)
Instructions
- Heat the Milk: Pour the milk into a large pot and heat over medium, stirring occasionally, until it reaches 190°F.
- Add the Acid: Remove from heat and gently stir in the vinegar or lemon juice. Let it sit for 10 minutes.
- Strain the Curds: Line a colander with cheesecloth, pour the mixture through, and let it drain for 10–20 minutes.
- Season: Transfer the curds to a bowl, add salt, and optional cream if desired. Mix well.
- Shape and Chill: Press into a mold or keep rustic. Chill for at least 1 hour before serving.
- Prep Time: 5 minutes
- Cook Time: 30 minutes
- Category: Appetizers