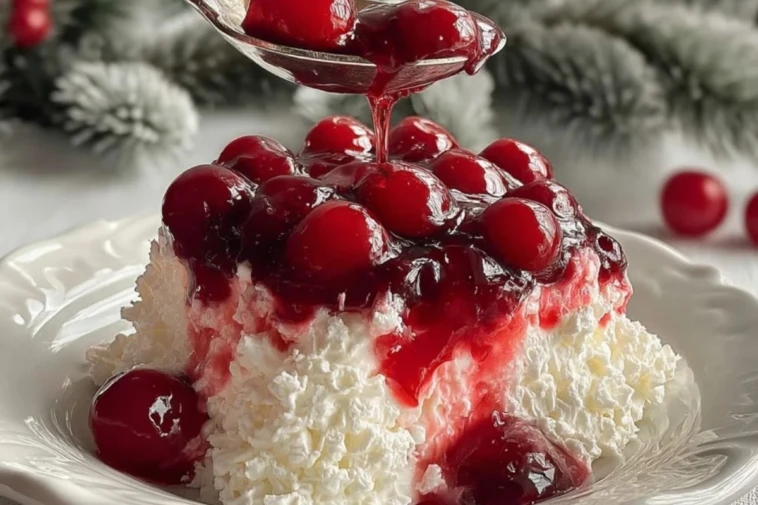
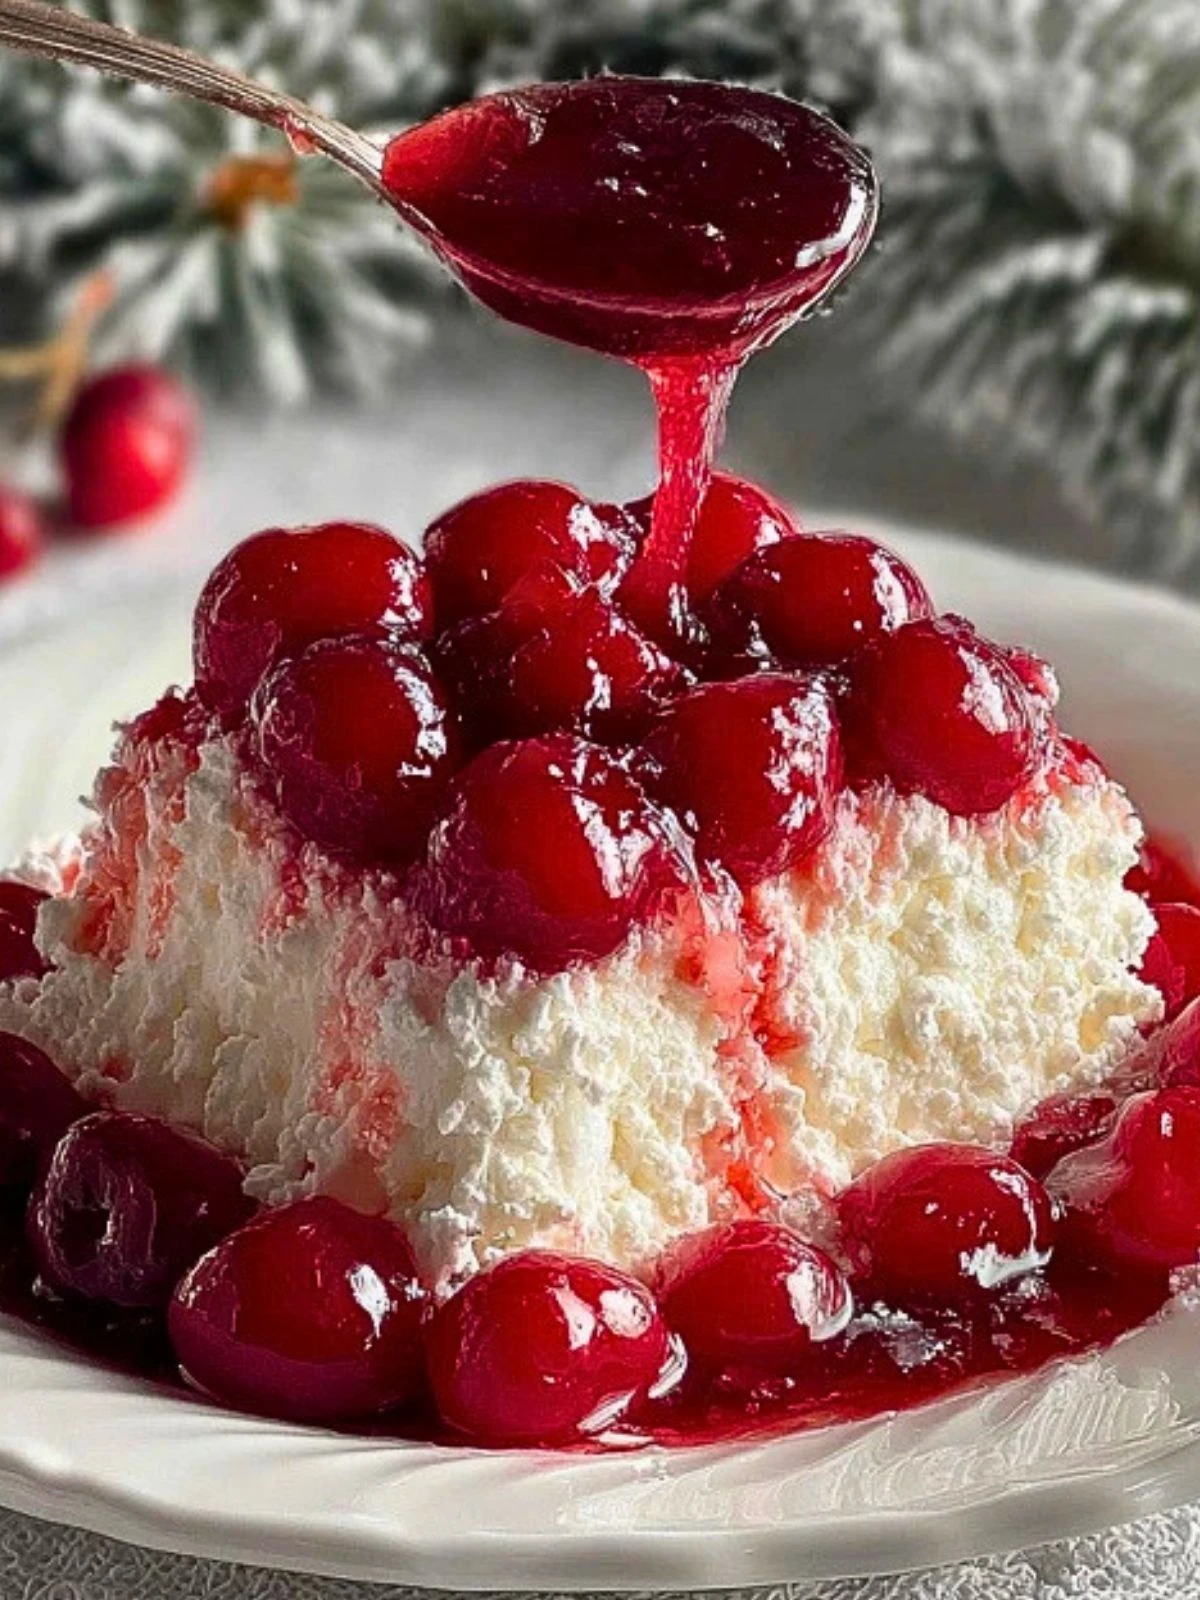
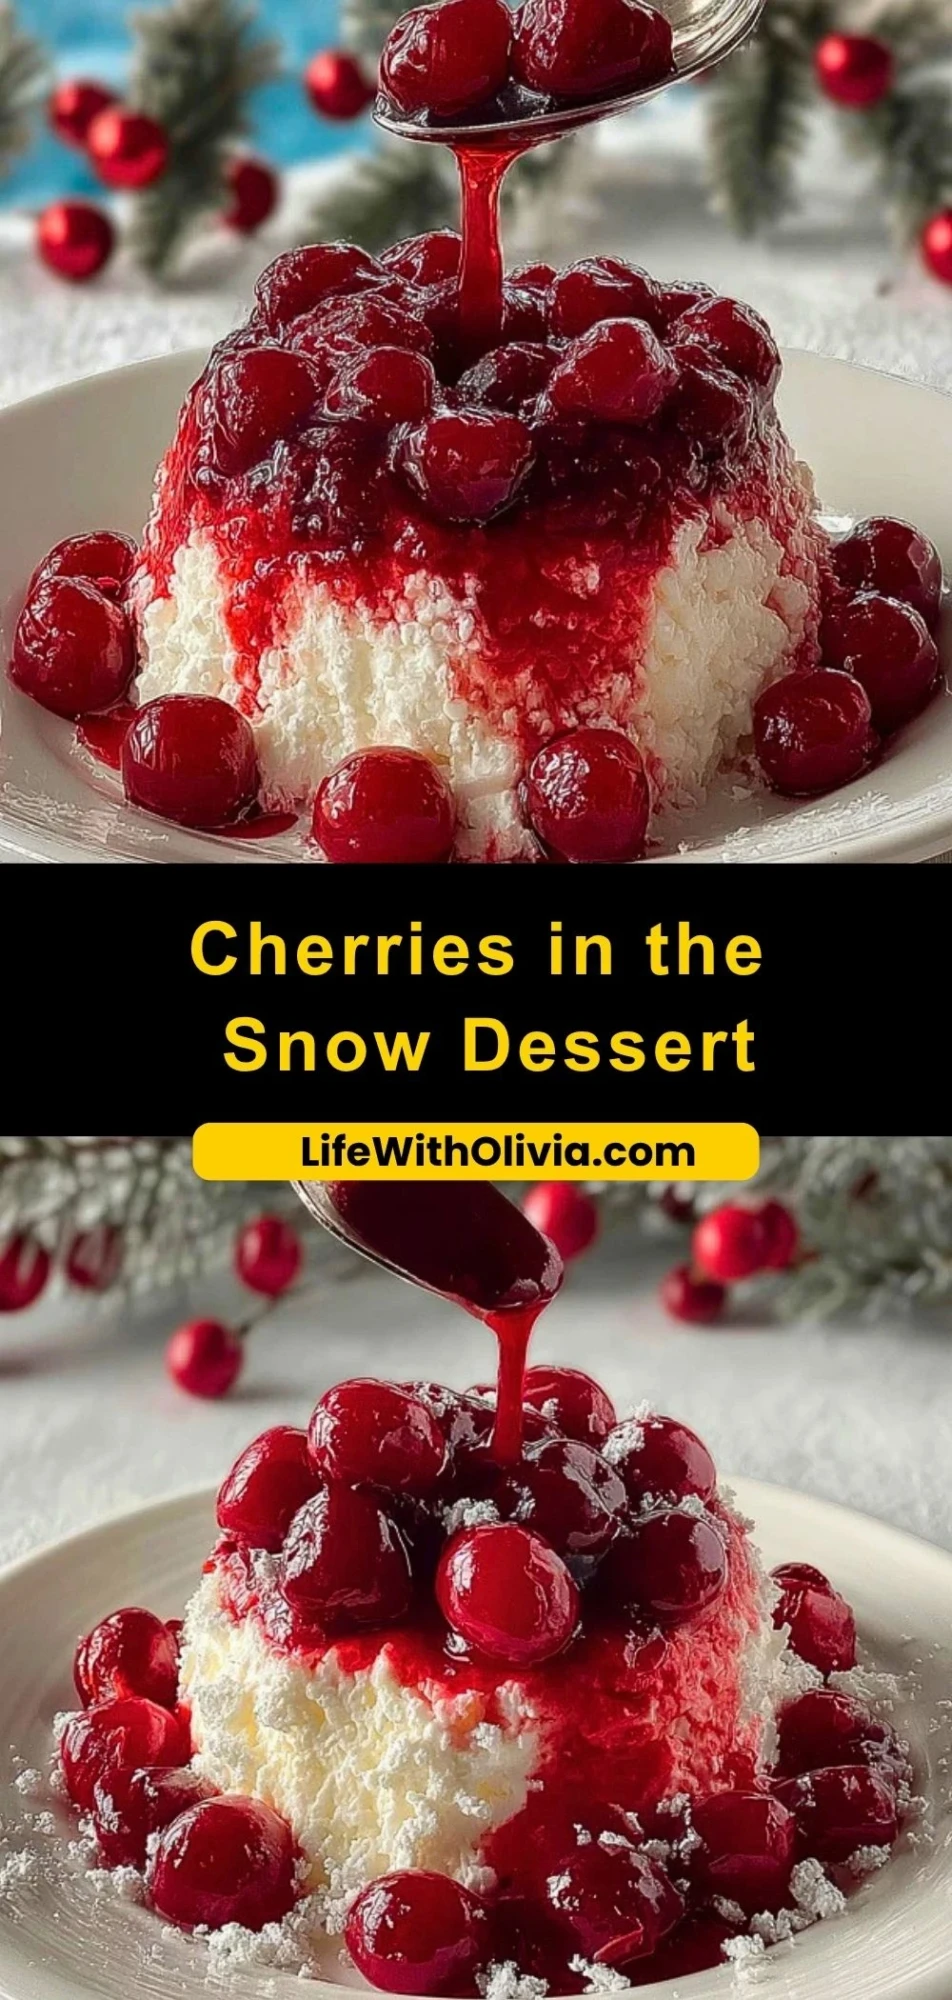
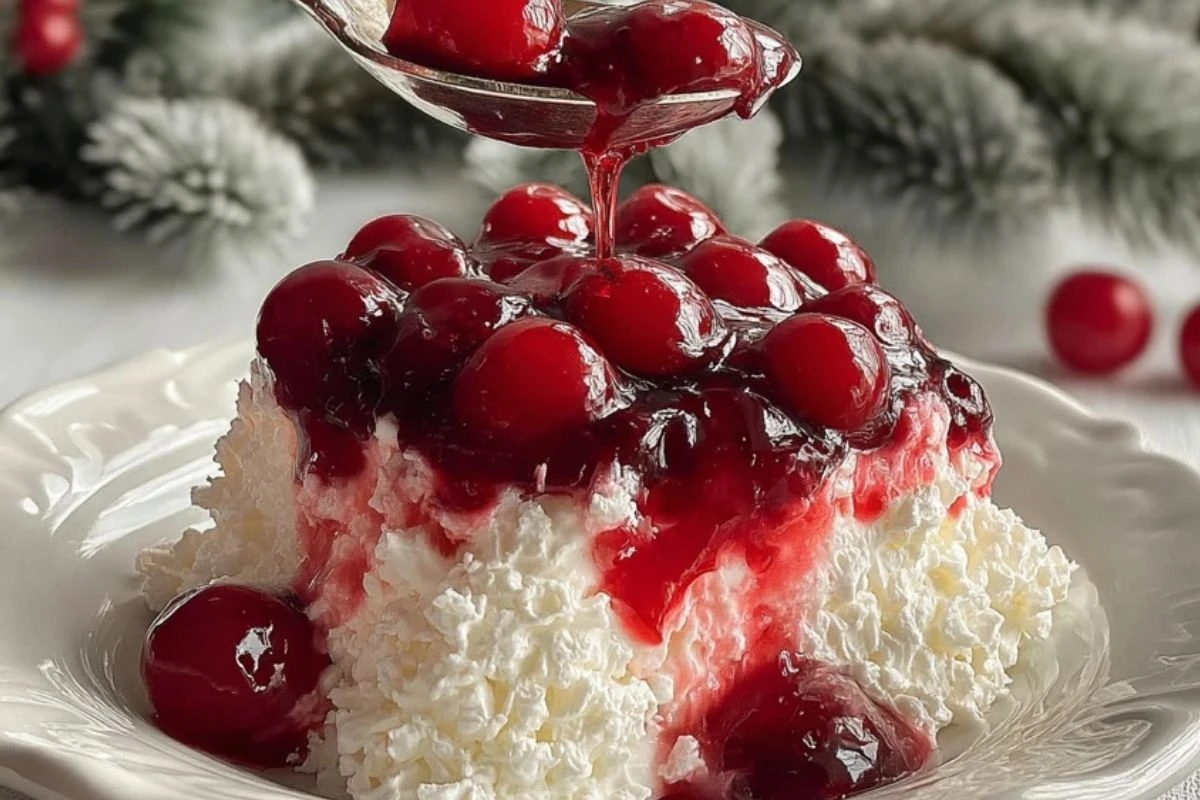
Fluffy, dreamy, and topped with a vibrant cherry glaze, Cherries in the Snow is the ultimate no-bake dessert that wins hearts at first glance. This retro favorite layers a creamy whipped filling over angel food cake, crowned generously with sweet-tart cherry pie filling. It looks like a snow-covered peak kissed by ruby red fruit, making it perfect for the holidays or any time you want a beautiful, light dessert with little effort.
Its appeal goes beyond the stunning appearance. This dessert is all about texture and contrast. The soft, airy cake, combined with smooth, lightly sweetened cream cheese and whipped topping, delivers a melt-in-your-mouth experience that is both nostalgic and irresistible. Whether you’re hosting a gathering or want a fridge-friendly treat, Cherries in the Snow is a chilled beauty you’ll come back to again and again.
Preparation Phase & Tools to Use
Creating Cherries in the Snow is delightfully simple, but the right tools make the process even smoother:
- Electric Mixer or Stand Mixer: Essential for beating cream cheese until it’s silky smooth and for folding in whipped topping without deflating it.
- Rubber Spatula: Helps combine ingredients gently and ensures you scrape every last bit of the fluffy mixture from your bowl.
- Serrated Knife: If you’re using a pre-made angel food cake, a serrated knife is best for cutting it without crushing its delicate crumb.
- Trifle Dish or 9×13 Glass Baking Dish: These clear containers allow you to beautifully showcase the dessert’s snowy layers and vivid cherry topping.
- Mixing Bowls: Multiple sizes are helpful for keeping your prep organized when assembling layers.
These tools help you assemble your dessert efficiently and present it in a way that’s as visually satisfying as it is delicious.

Ingredients for the Cherries in the Snow Dessert
- Angel Food Cake: This light and airy base offers a cloud-like texture that contrasts beautifully with the creamy and fruity layers.
- Cream Cheese: Adds richness and a subtle tang, making the dessert feel decadent without overpowering the lightness.
- Powdered Sugar: Blends smoothly into the cream cheese, adding gentle sweetness and a velvety finish.
- Vanilla Extract: Enhances the overall flavor with a touch of warm, aromatic depth.
- Whipped Topping (like Cool Whip): Delivers that fluffy, cloudlike texture essential to the “snowy” element.
- Cherry Pie Filling: Sweet, tart, and glossy, this topping adds vibrant color and the signature fruity pop that defines this dish.
How To Make the Cherries in the Snow Dessert
Step 1: Prepare the Creamy Layer
In a large mixing bowl, beat softened cream cheese until smooth. Add powdered sugar and vanilla extract, blending until fully combined. Fold in the whipped topping gently to maintain a fluffy texture.
Step 2: Layer the Cake
Cut angel food cake into cubes using a serrated knife. In a trifle dish or baking pan, place half of the cake cubes as the base layer.
Step 3: Add the Cream Layer
Spread half of the cream cheese mixture over the cake layer, smoothing it evenly with a spatula.
Step 4: Repeat Layers
Add the remaining cake cubes on top, followed by the rest of the creamy mixture. Smooth out the top to create a clean finish.
Step 5: Cherry Topping Finale
Spoon cherry pie filling over the top layer. Spread gently to cover the surface without mixing it into the cream.
Step 6: Chill and Set
Refrigerate the dessert for at least 2 hours before serving. This helps the layers firm up and meld together for the best flavor and presentation.
How to Serve and Store Cherries in the Snow Dessert
This dessert is best served cold, straight from the refrigerator. For a beautiful presentation, scoop portions into clear dessert cups or bowls to showcase the gorgeous layers. It’s ideal for potlucks, holidays, or casual family dinners.
When storing leftovers, cover the dish tightly with plastic wrap or transfer portions to an airtight container. It will stay fresh in the refrigerator for up to 3 days. Because of the whipped topping and cream cheese, freezing is not recommended—it alters the texture too much.
Frequently Asked Questions
How far in advance can I make this dessert?
You can prepare it up to 24 hours in advance. In fact, letting it chill overnight enhances the flavor and helps the layers set nicely.
Can I use homemade whipped cream instead of Cool Whip?
Yes, you can! Just make sure it’s stabilized with a bit of cornstarch or gelatin to prevent it from deflating.
Is there a gluten-free version?
Absolutely. Just use a gluten-free angel food cake or substitute with another GF sponge cake you love.
Can I switch out the cherry topping?
Of course. Blueberry or strawberry pie filling makes a delicious twist while still keeping that fruity brightness.
What if I don’t have a trifle dish?
No worries. A 9×13 glass baking dish works just as well, and it still shows off the layers beautifully.
Want More Dessert Ideas with a Twist?
If you loved making Cherries in the Snow, here are a few more unforgettable treats from Life With Olivia that bring a little magic to your dessert table:
- Pineapple Coconut Dream Cake with tropical flair in every bite.
- Strawberry Crunch Pound Cake that blends fruitiness with rich decadence.
- Paula Deen’s 5 Minute Fudge for an ultra-easy chocolate fix.
- Apple Enchiladas to enjoy fall flavors all year long.
- Coconut Snowballs for a bite-sized holiday treat.
For more sweet inspiration, check out my daily recipe posts over on Pinterest: Life With Olivia on Pinterest
Save This Recipe for Later
📌 Save this recipe to your Pinterest dessert board so you can come back to it any time.
Let me know in the comments how yours turned out! Did you use a homemade whipped topping or stick with Cool Whip? Did you try a new fruit twist?
I love seeing how others personalize this dessert. If you have tips, swaps, or even questions, drop them below so we can make this recipe even better together.
Cherries in the Snow Dessert
- Total Time: 2 hours 15 minutes
- Yield: 8 servings
- Diet: Vegetarian
Description
Cherries in the Snow is the ultimate no-bake dessert that’s as easy to make as it is stunning to serve. With fluffy whipped layers, light angel food cake, and vibrant cherry pie filling, this dessert is a showstopper for holidays, potlucks, or when you’re craving something refreshing yet indulgent. It’s perfect for fans of quick dessert ideas, easy recipes, or simply looking for a chilled sweet treat. The combination of creamy filling and tart cherries delivers a nostalgic flavor and a light, airy texture that makes it irresistible.
Ingredients
3 cups angel food cake, cubed
8 oz cream cheese, softened
1 cup powdered sugar
1 tsp vanilla extract
8 oz whipped topping (such as Cool Whip), thawed
1 can (21 oz) cherry pie filling
Instructions
1. Beat the softened cream cheese in a large mixing bowl until smooth.
2. Add powdered sugar and vanilla extract to the cream cheese. Mix until well combined.
3. Gently fold in the whipped topping, keeping the mixture fluffy.
4. Cut the angel food cake into 1-inch cubes using a serrated knife.
5. Place half of the cake cubes into a clear trifle dish or 9×13 glass dish.
6. Spread half of the cream mixture over the cake cubes and smooth it out.
7. Repeat with the remaining cake cubes and the rest of the cream layer.
8. Spoon the cherry pie filling evenly over the top layer.
9. Chill in the refrigerator for at least 2 hours before serving.
Notes
For a smoother cream cheese layer, bring cream cheese to room temperature before mixing.
Use homemade stabilized whipped cream for a richer taste, but ensure it’s firm.
A clear trifle dish really enhances the visual appeal of the dessert layers.
- Prep Time: 15 minutes
- Cook Time: 0 minutes
- Category: Dessert
- Method: No-Bake
- Cuisine: American
Nutrition
- Serving Size: 1/8 of recipe
- Calories: 265
- Sugar: 29g
- Sodium: 185mg
- Fat: 9g
- Saturated Fat: 6g
- Unsaturated Fat: 2g
- Trans Fat: 0g
- Carbohydrates: 42g
- Fiber: 1g
- Protein: 3g
- Cholesterol: 25mg
Keywords: easy dessert, cherry dessert, no bake recipe, whipped topping, holiday dessert